• Skip to primary navigation
  • Skip to main content
  • Skip to primary sidebar
  • Skip to footer

Total Home Remodeling

  • Home
  • Our Process
  • About Us
  • Remodeling
    • Basement
    • Bathroom
      • Walk In Bathtubs
    • Kitchen
    • Additions
    • Decks
      • DIY Deck Building
    • Basement Waterproofing
    • Restoration
  • Blog
  • Contact Us
  • FAQ
  • Cabinet

waterstone

How Much Bathroom Tiles Cost.

July 3, 2024 by waterstone 1 Comment

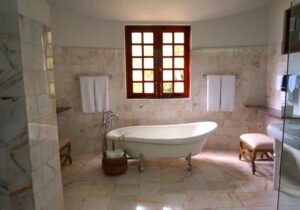
Remodeling a bathroom can be an exciting yet daunting task, and one of the most significant decisions homeowners face is choosing the right tiles. Bathroom tiles not only contribute to the overall aesthetic but also play a crucial role in the room’s functionality and durability. At Total Home Remodeling, we understand the importance of making informed choices. In this article, we’ll explore the various factors that influence the cost of bathroom tiles and provide an overview of the options available, helping you make the best decision for your remodeling project.

Factors Affecting the Cost of Bathroom Tiles
1. Tile Material

The material of the tile is one of the most significant factors that influence its cost. Here are some common types of bathroom tiles and their price ranges:

  • Ceramic Tiles: These are the most affordable option, ranging from $1 to $7 per square foot. Ceramic tiles are durable, easy to clean, and come in various colors and patterns.
  • Porcelain Tiles: Slightly more expensive than ceramic, porcelain tiles range from $3 to $10 per square foot. They are denser, less porous, and offer better resistance to moisture and stains.
  • Natural Stone Tiles: Options like marble, granite, and slate can cost between $5 and $30 per square foot. These tiles provide a luxurious look but require more maintenance.
  • Glass Tiles: Priced between $7 and $30 per square foot, glass tiles add a modern touch to any bathroom. They are non-porous and resistant to mold and mildew.
  • Metal Tiles: These can range from $15 to $50 per square foot. Metal tiles are often used as accents and add a contemporary flair to bathroom designs.

2. Tile Size and Shape

The size and shape of the tiles also impact the cost. Larger tiles often cover more area with fewer grout lines, making installation quicker and sometimes cheaper. However, they can be more expensive per tile. Standard sizes like 12×12 inches are typically more affordable, while unique shapes and custom sizes may increase the cost.

3. Tile Design and Finish

Tiles with intricate designs, patterns, or special finishes (such as matte, gloss, or textured surfaces) tend to be more expensive. Custom or hand-painted tiles will also add to the overall cost.

4. Installation Complexity

The complexity of the installation process can significantly affect labor costs. Simple layouts with standard-sized tiles are less expensive to install compared to intricate patterns like herringbone or mosaics, which require more precision and time.

5. Location and Local Market

The cost of bathroom tiles can vary based on your geographical location and the local market conditions. Prices might be higher in urban areas due to increased demand and higher living costs.

Cost Breakdown of Bathroom Tile Installation

To give you a clearer picture of the total cost of tiling your bathroom, let’s break down the expenses involved:

1. Tile Costs

Based on the tile material, size, and design, the cost can range from $1 to $50 per square foot. For a standard bathroom of 100 square feet, tile expenses can range from $100 to $5,000.

2. Labor Costs

Professional installation usually costs between $4 and $12 per square foot. For a 100-square-foot bathroom, labor costs can range from $400 to $1,200.

3. Additional Materials

Don’t forget to factor in the cost of additional materials such as grout, adhesive, sealant, and backer board. These materials can add another $1 to $3 per square foot, totaling $100 to $300 for a 100-square-foot bathroom.

4. Removal and Disposal

If you’re replacing existing tiles, you’ll need to account for the removal and disposal costs, which can range from $1 to $4 per square foot, totaling $100 to $400 for a 100-square-foot area.

5. Unexpected Costs

It’s wise to budget for unexpected expenses such as damaged subflooring, additional waterproofing, or custom tile cuts. A contingency budget of 10-15% of the total project cost is recommended.

Total Cost Estimate

Considering the various factors and cost breakdowns, the total cost of tiling a 100-square-foot bathroom can range from $700 to $6,900, with an average cost of around $3,000 to $4,000. This estimate includes mid-range ceramic or porcelain tiles, standard installation, and necessary materials.

Cost-Saving Tips

Remodeling your bathroom doesn’t have to break the bank. Here are some tips to help you save on tile costs:

  • Choose Standard Sizes: Standard-sized tiles are often more affordable and easier to install, reducing both material and labor costs.
  • Mix and Match: Use expensive tiles as accents or for feature walls, and combine them with more affordable options for the rest of the bathroom.
  • Shop Sales and Discounts: Look for sales, discounts, or clearance items at tile stores or online retailers to find quality tiles at lower prices.
  • DIY Installation: If you have the skills and experience, consider doing the installation yourself to save on labor costs. However, ensure you are confident in your abilities to avoid costly mistakes.
  • Plan Ahead: Purchase a little more than needed to account for breakage or future repairs, but avoid buying excessive quantities that will go to waste.

Frequently Asked Questions

1. What is the best type of tile for a bathroom floor?

The best type of tile for a bathroom floor depends on your preferences and budget. Porcelain and ceramic tiles are popular choices due to their durability, water resistance, and affordability. Natural stone tiles, like marble or granite, provide a luxurious look but require more maintenance. Slip resistance is also crucial for bathroom floors, so consider tiles with a textured surface or a slip-resistant rating.

2. How long does it take to install bathroom tiles?

The installation time for bathroom tiles depends on several factors, including the size of the bathroom, the complexity of the design, and the type of tiles used. On average, a professional installation for a standard bathroom can take 3 to 7 days. This timeline includes preparing the surface, laying the tiles, allowing the adhesive to set, grouting, and sealing.

3. How do I maintain and clean bathroom tiles?

Maintaining and cleaning bathroom tiles is relatively simple. Regularly sweep or vacuum the floor to remove dirt and debris. Use a mild detergent or a mixture of water and vinegar to clean the tiles, avoiding harsh chemicals that can damage the surface. For grout lines, use a grout cleaner and a brush to remove stains and mold. Sealing the grout periodically can also help prevent stains and moisture damage.

Conclusion

Choosing the right tiles for your bathroom is a crucial step in the remodeling process. By understanding the factors that influence tile costs and considering your budget and preferences, you can make an informed decision that enhances the beauty and functionality of your bathroom. At Total Home Remodeling, we are here to help you every step of the way, ensuring your bathroom remodel is a success. Whether you opt for affordable ceramic tiles or splurge on luxurious natural stone, our team of experts is ready to bring your vision to life.
Filed Under: Bathroom Flooring Tagged With: Bathroom Tile Installation, Cost of Bathroom Tiles, functionality and durability, Remodeling a bathroom

Will Finishing Your Basement Add Value to Your Home?

July 2, 2024 by waterstone 1 Comment

Will Finishing Your Basement Add Value to Your Home?

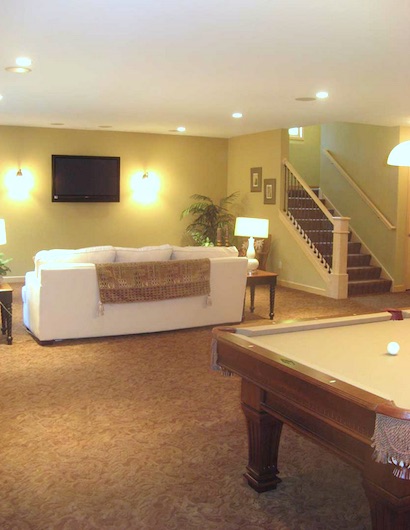
Finishing a basement is a popular home improvement project that promises to add both functional living space and increased value to your home. However, many homeowners wonder if the investment will truly pay off when it comes time to sell. This article explores the benefits, potential returns, and key considerations involved in finishing a basement, helping you make an informed decision about whether this renovation is right for you.

Benefits of Finishing Your Basement

  1. Increased Living Space
    One of the most obvious benefits of finishing a basement is the additional living space it provides. This can be transformed into various functional areas, such as:

    • Family Room: A cozy place for family gatherings and entertainment.
    • Home Office: Especially relevant in the age of remote work.
    • Guest Suite: An extra bedroom and bathroom for visitors.
    • Home Gym: A private space for exercise and wellness.
    • Recreation Room: For hobbies, games, or a home theater.
  2. The versatility of a finished basement makes it a valuable addition to any home, accommodating various needs and lifestyles.
  3. Increased Home Value
    Finishing a basement can significantly boost the value of your home. According to industry experts, homeowners can expect to recoup approximately 70-75% of the cost of a basement finish when they sell their home. This return on investment (ROI) can vary based on factors such as the quality of the finish, the functionality of the space, and the overall real estate market in your area.
  4. Enhanced Appeal to Buyers
    A well-finished basement can be a major selling point, making your home more attractive to potential buyers. Buyers often seek homes with additional living spaces that are move-in ready, and a finished basement can set your property apart from others on the market.
  5. Improved Energy Efficiency
    Finishing your basement can improve your home’s overall energy efficiency. Proper insulation and sealing can reduce drafts and heat loss, leading to lower energy bills. Additionally, modern basements often incorporate energy-efficient lighting and heating solutions.
  6. Maximized Property Usage
    An unfinished basement is often underutilized, serving as a storage space for items that are rarely used. By finishing your basement, you can maximize the usable square footage of your home, making it a more efficient and enjoyable living environment.

Factors to Consider Before Finishing Your Basement

  1. Cost
    The cost of finishing a basement can vary widely depending on the size of the space, the quality of materials used, and the complexity of the design. On average, homeowners can expect to spend between $20,000 and $50,000 on a basement finishing project. It’s crucial to create a detailed budget and consider potential hidden costs, such as plumbing, electrical work, and moisture control.
  2. Building Codes and Permits
    Basement finishing projects must comply with local building codes and regulations. This often involves obtaining permits and undergoing inspections to ensure that the work meets safety standards. Failing to comply with these regulations can result in costly fines and may affect the resale value of your home.
  3. Moisture and Waterproofing
    Basements are prone to moisture issues, which can lead to mold and structural damage if not properly addressed. Prior to finishing your basement, it’s essential to implement effective waterproofing solutions, such as sump pumps, drainage systems, and vapor barriers, to protect your investment.
  4. Design and Layout
    Thoughtful design and layout are key to creating a functional and aesthetically pleasing finished basement. Consider factors such as natural light, ceiling height, and the placement of rooms to ensure the space meets your needs and preferences. Consulting with a professional designer or contractor can help you optimize the layout and avoid common pitfalls.
  5. Return on Investment
    While finishing a basement can add value to your home, it’s important to evaluate the potential ROI based on your local real estate market. Research comparable homes in your area to determine how much value a finished basement might add and whether the investment aligns with your financial goals.

Maximizing the Value of Your Finished Basement

To ensure you get the most value from your basement finishing project, consider the following tips:

  1. Quality Materials and Workmanship
    Invest in high-quality materials and hire reputable contractors to ensure a professional finish. Cutting corners on materials or labor can lead to costly repairs and reduce the overall value of your investment.
  2. Functionality and Flexibility
    Design your finished basement with flexibility in mind. Choose a layout that can be easily adapted for different uses, such as converting a playroom into a home office or a guest suite into a rental unit. This versatility can make your home more appealing to a broader range of buyers.
  3. Consistent Design
    Ensure that the design and finishes of your basement are consistent with the rest of your home. A cohesive look enhances the overall appeal and makes the basement feel like a natural extension of the living space.
  4. Energy Efficiency
    Incorporate energy-efficient features, such as LED lighting, programmable thermostats, and high-efficiency HVAC systems. These upgrades not only reduce energy costs but also appeal to environmentally conscious buyers.
  5. Legal Compliance
    Adhere to all building codes and regulations to ensure the safety and legality of your finished basement. This includes proper egress windows, smoke detectors, and adequate ventilation. Legal compliance enhances the value and marketability of your home.

Frequently Asked Questions

  1. How long does it take to finish a basement?
    The timeline for finishing a basement can vary depending on the scope of the project, the complexity of the design, and the availability of materials and labor. On average, a basement finishing project can take between six weeks to three months from start to finish. It’s essential to discuss the timeline with your contractor and account for any potential delays.
  2. Will finishing my basement increase my property taxes?
    Finishing your basement can potentially increase your property taxes, as it adds to the overall square footage and value of your home. The exact increase depends on local tax assessment policies and the extent of the improvements. It’s advisable to consult with a local tax assessor or real estate professional to understand how finishing your basement might impact your property taxes.
  3. Can I finish my basement myself, or should I hire a professional?
    While some homeowners with DIY skills might choose to tackle parts of a basement finishing project themselves, hiring a professional contractor is generally recommended. Professionals have the expertise to ensure that the work is done correctly, safely, and in compliance with building codes. Additionally, a professionally finished basement is likely to yield a higher return on investment and appeal to potential buyers.

Conclusion

Finishing your basement is a substantial home improvement project that offers numerous benefits, including increased living space, enhanced home value, and improved energy efficiency. However, it’s essential to carefully consider the costs, design, and potential return on investment before embarking on this renovation. By planning meticulously and prioritizing quality, you can create a finished basement that not only meets your needs but also adds significant value to your home.

For more information or to get started on your basement finishing project, contact Total Home Remodeling today. Our team of experienced professionals is ready to help you transform your basement into a beautiful, functional space that enhances your home’s value and appeal.

Filed Under: Basement Finishing Tagged With: Benefits of Finishing Your Basement, Finishing a Basement, increased value to your home

What is the Actual Cost of a Walk-In Shower?

July 2, 2024 by waterstone 1 Comment

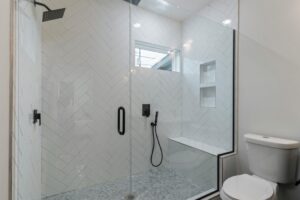
When considering a bathroom remodel, one of the most popular and luxurious upgrades is the addition of a walk-in shower. Walk-in showers provide not only a modern aesthetic but also convenience, accessibility, and increased home value. However, many homeowners hesitate due to concerns about the cost. Understanding the factors that influence the cost of a walk-in shower can help you make an informed decision and plan your budget accordingly.What is the actual cost of a walk-in shower?

Factors Influencing the Cost of a Walk-In Shower

  1. Shower Size and Design
    The size and design of your walk-in shower play a significant role in determining the overall cost. Larger showers require more materials and labor, leading to higher expenses. Additionally, custom designs, such as those with unique shapes, multiple showerheads, or intricate tile patterns, can increase costs compared to standard, pre-fabricated options.
  2. Materials
    The choice of materials greatly impacts the cost. Common materials for walk-in showers include:

    • Tiles: Ceramic, porcelain, and natural stone tiles are popular choices. Ceramic and porcelain are generally more affordable, while natural stone can be quite expensive.
    • Glass: Frameless glass enclosures provide a sleek, modern look but come at a premium price compared to framed options.
    • Fixtures: High-end fixtures like rain showerheads, body sprays, and hand showers can add to the cost.
  3. Labor and Installation
    Labor costs vary depending on the complexity of the installation and the region in which you live. Hiring a professional contractor ensures quality work but will increase the overall expense. Complex installations involving plumbing adjustments, custom tiling, and specialized features will naturally cost more.
  4. Accessibility Features
    If you are remodeling with accessibility in mind, such as for aging in place or accommodating a disability, additional features like grab bars, built-in seating, and non-slip flooring may be required. These features not only add to the safety and functionality of the shower but also to the overall cost.
  5. Plumbing and Electrical Work
    Depending on the layout of your existing bathroom, plumbing and electrical modifications might be necessary. Moving or adding water lines, drains, or electrical outlets can significantly increase costs.
  6. Permits and Inspections
    In many areas, significant renovations require permits and inspections to ensure compliance with local building codes. These permits come with their own fees and may require multiple inspections throughout the project.
  7. Geographic Location
    The cost of living and the availability of skilled labor in your area can influence the cost of your walk-in shower. Urban areas or regions with a high demand for construction services often have higher labor rates.

Breakdown of Costs

To provide a clearer picture, let’s break down the costs into three categories: low, mid, and high range.

  1. Low-Range Cost
    • Size: Small to medium (3×4 feet)
    • Materials: Basic ceramic tiles, framed glass door, standard fixtures
    • Labor: Simple installation with minimal modifications
    • Accessibility: Basic grab bars
    • Plumbing/Electrical: Minimal adjustments
  2. Estimated Cost: $3,000 – $5,000
  3. Mid-Range Cost
    • Size: Medium to large (4×5 feet)
    • Materials: Porcelain tiles, semi-frameless glass door, upgraded fixtures
    • Labor: Moderate installation with some modifications
    • Accessibility: Enhanced features like built-in seating
    • Plumbing/Electrical: Moderate adjustments
  4. Estimated Cost: $7,000 – $12,000
  5. High-Range Cost
    • Size: Large custom design (5×6 feet or larger)
    • Materials: Natural stone tiles, frameless glass door, high-end fixtures
    • Labor: Complex installation with significant modifications
    • Accessibility: Advanced features including full ADA compliance
    • Plumbing/Electrical: Extensive adjustments
  6. Estimated Cost: $15,000 – $20,000+

Cost-Saving Tips

While a walk-in shower can be a significant investment, there are ways to manage costs without compromising on quality:

  1. Choose Affordable Materials: Opt for high-quality but affordable materials. For example, porcelain tiles can mimic the look of natural stone at a fraction of the cost.
  2. Simplify the Design: Standard designs and sizes typically cost less than custom options. Avoid overly complex patterns and shapes.
  3. DIY Some Aspects: If you have the skills, consider doing some of the work yourself, such as demolition or painting, to save on labor costs.
  4. Shop Around: Get multiple quotes from contractors and suppliers to ensure you’re getting the best deal.
  5. Plan Ahead: Make a detailed plan and budget, anticipating any potential additional costs that might arise during the project.

Frequently Asked Questions

  1. How long does it take to install a walk-in shower?
    The installation time for a walk-in shower varies based on the complexity of the project. On average, a straightforward installation might take about one to two weeks. More complex projects, especially those involving significant plumbing or electrical work, can take three to four weeks or longer. It’s essential to discuss the timeline with your contractor to set realistic expectations.
  2. Do walk-in showers add value to a home?
    Yes, walk-in showers can add significant value to a home. They are considered a desirable feature for many homebuyers, particularly those looking for modern, accessible, and low-maintenance bathroom options. A well-designed walk-in shower can enhance the overall appeal of your home, making it more attractive in the real estate market.
  3. Are walk-in showers suitable for small bathrooms?
    Walk-in showers can be an excellent choice for small bathrooms. They can create a sense of openness and make the bathroom appear larger. Opting for clear glass enclosures and light-colored tiles can further enhance the feeling of space. Additionally, walk-in showers can be customized to fit various sizes and layouts, making them versatile for different bathroom dimensions.

Conclusion

Investing in a walk-in shower can transform your bathroom into a stylish, functional, and accessible space. While the costs can vary widely based on several factors, careful planning and budgeting can help you achieve the bathroom of your dreams without breaking the bank. By understanding the elements that influence cost and considering cost-saving strategies, you can make a well-informed decision that adds value and enjoyment to your home.

For more information or to get a personalized quote for your walk-in shower project, contact Total Home Remodeling today. Our team of experienced professionals is ready to help you create the perfect bathroom to meet your needs and preferences.

Filed Under: Bathroom Remodeler Tagged With: Cost of a Walk-In Shower, Cost-Saving Tips, increased home value, Walk-in showers

What is the Best Countertop to Use in a Kitchen?

July 1, 2024 by waterstone 1 Comment

Choosing the right countertop for your kitchen is a crucial decision that affects not only the functionality of your cooking space but also its aesthetic appeal and value. With numerous options available, it can be challenging to determine which material best suits your needs and lifestyle. This article explores the various types of kitchen countertops, their advantages and disadvantages, and provides expert recommendations to help you make an informed choice. Additionally, we will address some frequently asked questions to clarify common concerns about kitchen countertops.

Types of Kitchen Countertops

  1. Granite Countertops
    • Advantages:
      • Durability: Granite is one of the hardest natural stones, making it highly resistant to scratches and heat.
      • Aesthetic Appeal: Each granite slab is unique, offering a wide range of colors and patterns.
      • Increased Home Value: Granite countertops can enhance the value of your home due to their premium look and durability.
    • Disadvantages:
      • Cost: Granite is relatively expensive compared to other materials.
      • Maintenance: Requires periodic sealing to prevent stains and maintain its appearance.
      • Weight: Granite is heavy and may require additional structural support in some cases.
  2. Quartz Countertops
    • Advantages:
      • Non-Porous: Quartz is non-porous, making it resistant to stains, bacteria, and mold.
      • Low Maintenance: Unlike natural stone, quartz does not require sealing and is easy to clean.
      • Variety: Available in a wide range of colors and patterns, including some that mimic natural stone.
    • Disadvantages:
      • Cost: Quartz is comparable in price to granite, making it a high-end option.
      • Heat Sensitivity: Quartz can be damaged by excessive heat, so it’s important to use trivets or hot pads.
  3. Marble Countertops
    • Advantages:
      • Elegant Appearance: Marble offers a timeless, classic look with its unique veining and patterns.
      • Cool Surface: Ideal for baking and pastry-making due to its naturally cool surface.
    • Disadvantages:
      • Porosity: Marble is porous and can stain easily, especially from acidic substances like lemon juice and red wine.
      • Maintenance: Requires regular sealing and careful maintenance to avoid etching and staining.
      • Cost: Marble is one of the more expensive countertop options.
  4. Laminate Countertops
    • Advantages:
      • Affordability: Laminate is one of the most cost-effective countertop materials.
      • Variety: Available in a wide range of colors, patterns, and textures, including designs that mimic natural stone.
      • Low Maintenance: Easy to clean and does not require sealing.
    • Disadvantages:
      • Durability: Laminate is less durable than natural stone and can be damaged by heat, scratches, and moisture.
      • Appearance: While modern laminates have improved, they may not offer the same high-end look as natural stone or quartz.
  5. Butcher Block Countertops
    • Advantages:
      • Warm Aesthetic: Provides a warm, natural look that complements various kitchen styles.
      • Work Surface: Ideal for chopping and food preparation.
      • Repairable: Minor damage can be sanded out and refinished.
    • Disadvantages:
      • Maintenance: Requires regular oiling to prevent drying and cracking.
      • Susceptible to Damage: Can be damaged by moisture, heat, and scratches.
      • Bacteria: Wood is porous and can harbor bacteria if not properly maintained.
  6. Solid Surface Countertops
    • Advantages:
      • Seamless Appearance: Offers a smooth, seamless look, especially for integrated sinks and backsplashes.
      • Non-Porous: Resistant to stains and easy to clean.
      • Repairable: Minor scratches and damage can be repaired with sanding.
    • Disadvantages:
      • Heat Sensitivity: Can be damaged by excessive heat, similar to quartz.
      • Appearance: May not have the same high-end appeal as natural stone or quartz.
      • Cost: Mid-range in terms of cost, but can be expensive for custom designs.
  7. Concrete Countertops
    • Advantages:
      • Customization: Can be customized in terms of color, shape, and finish.
      • Durability: Highly durable and resistant to heat and scratches.
      • Unique Look: Offers a modern, industrial aesthetic.
    • Disadvantages:
      • Cost: Customization and installation can be expensive.
      • Maintenance: Requires sealing to prevent stains and cracks.
      • Weight: Heavy and may require additional structural support.

Expert Recommendations

When selecting the best countertop for your kitchen, consider the following factors:

  1. Budget: Determine your budget and choose a material that offers the best balance of cost and features. For high-end options, granite, quartz, and marble are excellent choices. For more budget-friendly options, consider laminate or butcher block.
  2. Durability: Consider how you use your kitchen. If you frequently cook and entertain, opt for a durable and low-maintenance material like quartz or granite. If you prefer a specific aesthetic, be prepared for the maintenance required by materials like marble or butcher block.
  3. Aesthetic: Choose a material that complements your kitchen’s design. Natural stones like granite and marble offer unique patterns, while quartz and solid surfaces provide a more uniform appearance. Laminate and concrete offer versatile design options to match various styles.
  4. Maintenance: Consider the level of maintenance you are willing to undertake. Quartz and solid surfaces are low maintenance, while natural stones like granite and marble require periodic sealing. Butcher block requires regular oiling, and laminate is the easiest to maintain but less durable.

Frequently Asked Questions (FAQs)

1. How do I maintain and clean my kitchen countertops?

The maintenance and cleaning requirements vary depending on the countertop material:

  • Granite and Marble: Clean with a mild soap and water solution. Avoid harsh chemicals and acidic cleaners. Seal periodically to maintain their resistance to stains and damage.
  • Quartz: Wipe with a damp cloth and mild soap. Avoid abrasive cleaners and excessive heat.
  • Laminate: Clean with a mild soap and water solution. Avoid abrasive pads and harsh chemicals.
  • Butcher Block: Clean with a mild soap and water solution. Regularly oil the surface to prevent drying and cracking.
  • Solid Surface: Clean with a mild soap and water solution. Minor scratches can be sanded out.

2. Can I place hot pots and pans directly on my countertops?

Placing hot pots and pans directly on countertops can cause damage to most materials:

  • Granite: Generally heat-resistant but can crack under extreme temperature changes.
  • Quartz: Can be damaged by excessive heat, so use trivets or hot pads.
  • Marble: Susceptible to heat damage and etching from acidic substances.
  • Laminate: Easily damaged by heat, so avoid placing hot items directly on the surface.
  • Butcher Block: Heat can damage the wood, so use trivets or hot pads.
  • Solid Surface: Can be damaged by heat, so use trivets or hot pads.

3. What is the most durable countertop material?

The most durable countertop materials are granite and quartz. Both are highly resistant to scratches, stains, and heat. Granite offers a unique natural look, while quartz provides a non-porous, low-maintenance option. Solid surface and concrete countertops are also durable but require more maintenance to prevent damage.

Conclusion

Choosing the best countertop for your kitchen involves balancing your budget, aesthetic preferences, and maintenance requirements. Whether you prefer the timeless elegance of marble, the durability of granite, the versatility of quartz, or the affordability of laminate, there is a countertop material to suit your needs. Consider the advantages and disadvantages of each option and consult with a professional to ensure your kitchen countertop meets your functional and design goals.

At Total Home Remodeling, we are committed to helping you create the kitchen of your dreams. Our experienced team can guide you through the selection process, ensuring you choose the best countertop material for your needs and lifestyle. Contact us today to learn more about our services and how we can assist you with your next kitchen remodeling project.

Filed Under: Kitchen Countertops Tagged With: Choosing the right countertop, Kitchen Countertops, the most durable countertop, Types of Kitchen Countertops

How Much Does a Kitchen Island Cost?

July 1, 2024 by waterstone 1 Comment

Kitchen islands have become an essential feature in modern kitchen design, offering additional counter space, storage, and a central area for cooking and socializing. However, determining the cost of installing a kitchen island can be challenging due to the numerous factors that influence the overall price. In this article, we will explore the various elements that impact the cost of a kitchen island, provide a detailed breakdown of potential expenses, and answer some frequently asked questions to help you make an informed decision.

Factors Influencing the Cost of a Kitchen Island

  1. Size and Shape
    • The size and shape of the kitchen island significantly affect the cost. Larger islands require more materials and labor, increasing the overall expense. Additionally, complex shapes or custom designs can add to the cost due to the extra time and craftsmanship involved.
  2. Materials
    • The choice of materials for the island’s countertop, cabinetry, and other features plays a crucial role in determining the price. Common countertop materials include granite, quartz, marble, and laminate, each varying in cost. Similarly, the type of wood or finish used for the cabinetry can impact the total price.
  3. Features and Appliances
    • Adding features such as sinks, cooktops, or built-in appliances can significantly increase the cost of a kitchen island. These additions require extra plumbing, electrical work, and specialized installation, contributing to higher expenses.
  4. Labor and Installation
    • Labor costs can vary depending on the complexity of the installation and the region where you live. Custom-built islands often require skilled carpenters, electricians, and plumbers, which can add to the overall labor costs.
  5. Customization and Design
    • Customization options, such as unique finishes, intricate designs, and personalized storage solutions, can increase the cost. While these features can enhance the functionality and aesthetic appeal of the kitchen island, they often come with a higher price tag.

Breakdown of Potential Expenses

Basic Kitchen Island

A basic kitchen island typically includes standard features and materials without extensive customization. Here is a breakdown of the potential costs:

  • Materials:
    • Countertop (Laminate): $200 – $500
    • Cabinetry (Stock): $300 – $800
  • Labor and Installation:
    • Assembly and Installation: $500 – $1,000
  • Total Cost:
    • $1,000 – $2,300

Mid-Range Kitchen Island

A mid-range kitchen island offers more features, better-quality materials, and some customization. Here is a breakdown of the potential costs:

  • Materials:
    • Countertop (Granite or Quartz): $800 – $2,000
    • Cabinetry (Semi-Custom): $1,000 – $3,000
    • Additional Features (e.g., sink, basic appliances): $500 – $1,500
  • Labor and Installation:
    • Assembly, Plumbing, and Electrical Work: $1,500 – $3,000
  • Total Cost:
    • $3,800 – $9,500

High-End Kitchen Island

A high-end kitchen island includes top-of-the-line materials, extensive customization, and premium features. Here is a breakdown of the potential costs:

  • Materials:
    • Countertop (Marble or High-End Quartz): $2,500 – $5,000
    • Cabinetry (Custom): $3,000 – $8,000
    • Premium Features (e.g., professional-grade appliances, advanced storage solutions): $2,000 – $5,000
  • Labor and Installation:
    • Custom Design, Specialized Installation: $3,000 – $7,000
  • Total Cost:
    • $10,500 – $25,000+

Additional Considerations

  1. Permits and Regulations
    • Depending on your location and the scope of the project, you may need permits for electrical, plumbing, and structural work. These permits can add to the overall cost, so it’s essential to check local regulations and include these expenses in your budget.
  2. Existing Kitchen Layout
    • The current layout of your kitchen can impact the cost of installing a kitchen island. For instance, if significant modifications are required to accommodate the island, such as relocating plumbing or electrical lines, this can increase the overall expense.
  3. DIY vs. Professional Installation
    • While DIY installation can save money, it’s crucial to have the necessary skills and tools to complete the project safely and correctly. Hiring professionals ensures that the kitchen island is installed to code and meets your design expectations, though it comes at a higher cost.

Frequently Asked Questions (FAQs)

1. What is the average cost of installing a kitchen island?

The average cost of installing a kitchen island varies widely based on the size, materials, and features included. On average, a kitchen island can cost between $3,000 and $5,000 for a mid-range option. However, costs can range from $1,000 for a basic island to over $25,000 for a high-end, customized island.

2. Can I install a kitchen island in a small kitchen?

Yes, a kitchen island can be installed in a small kitchen, but it’s essential to consider the available space and layout. Compact or portable kitchen islands are designed specifically for smaller kitchens and can provide additional counter space and storage without overwhelming the room. Consulting with a kitchen designer can help determine the best size and style for your space.

3. What features should I consider adding to my kitchen island?

The features you choose for your kitchen island should depend on your specific needs and preferences. Common features include additional storage (e.g., cabinets, drawers), built-in appliances (e.g., microwave, wine cooler), seating areas, and specialized cooking zones (e.g., cooktop, prep sink). Consider how you plan to use the island and prioritize features that will enhance its functionality and your overall kitchen experience.

Conclusion

A kitchen island is a versatile and valuable addition to any kitchen, offering enhanced functionality, storage, and aesthetic appeal. Understanding the factors that influence the cost and considering your specific needs can help you plan and budget for your kitchen island project effectively. Whether you opt for a basic, mid-range, or high-end island, investing in a well-designed kitchen island can significantly improve your kitchen’s overall functionality and value.

At Total Home Remodeling, we are dedicated to helping you create the kitchen of your dreams. Our team of experienced professionals can guide you through every step of the process, ensuring that your kitchen island meets your design and budget requirements. Contact us today to learn more about our services and how we can assist you with your next kitchen remodeling project.

Filed Under: Kitchen Remodeler Tagged With: additional counter space, cooking, installing a kitchen island, Kitchen Island

  • « Go to Previous Page
  • Page 1
  • Interim pages omitted …
  • Page 7
  • Page 8
  • Page 9
  • Page 10
  • Go to Next Page »

Primary Sidebar

We believe that there is no remodeling project that is too small or too big for us. We would be glad to put together a competitive yet quality estimate that will give you what you want at an affordable price. Contact us today for a free estimate!  612-800-0616

Footer

Contact Us

Total Home Remodeling
(612) 800-0616

Email: totalhomeremodelingmn@gmail.com

© Copyright 2022 Total Home Remodeling, All Rights Reserved

Search Our Site

  • MN Home Remodeling Contractors
  • About Us
  • MN Deck Builders
  • Remodeling Services
  • MN Kitchen Remodeling Contractors
  • MN Basement Remodeling Near Me
  • MN Bathroom Remodeling Contractors
  • Contact Us Now for a Free Estimate!
  • Disclaimer
  • Privacy Policy
  • Terms of Use
  • HTML Site Map
  • Blog

Recent Blog Posts

  • Transform Your Kitchen: The Ultimate Guide To Choosing The Perfect Backsplash
  • Transform Your Kitchen: The Ultimate Guide To Choosing The Perfect Countertops
  • DIY Kitchen Remodel: Step-By-Step Guide To A Budget-Friendly Transformation
  • Green Makeover: Transforming Your Kitchen Into An Eco-Friendly Haven
  • Transform Your Kitchen: The Ultimate Guide To Choosing The Perfect Flooring

MN Service Area
